
How to Choose a Dot Peen Marking Machine in 2026?
Choosing a Dot Peen Marking machine in 2026 requires more than comparing prices and marking speeds. The right system must produce readable, durable identification across real production conditions. That may include oily steel parts, painted aluminum housings, or components heated after marking. In practice, small differences in pin force, controller stability, and fixture design can affect traceability. A perfect machine does not exist. The best choice depends on your materials, production volume, required characters, and verification process.
Industry data supports a careful, measurable approach. The International Federation of Robotics reported 541,302 industrial robots installed worldwide in 2023 in its World Robotics 2024 report. This growth reflects wider automation adoption and raises expectations for reliable machine communication. Meanwhile, Deloitte’s 2024 Smart Manufacturing and Operations Survey highlights the continuing importance of data integration, equipment reliability, and production visibility. These findings matter because modern marking equipment increasingly connects with PLCs, MES platforms, scanners, and vision systems.
A capable Dot Peen Marking solution should offer adjustable marking depth, repeatable positioning, and clear results under factory lighting. Check whether the controller supports common industrial interfaces and stores verified marking parameters. Examine sample marks on your actual alloys before purchasing. Ask about stylus life, service response, software updates, and spare-part availability. ISO/IEC 15415 and ISO/IEC 15416 can guide barcode quality evaluation when codes are included. However, compliance alone does not guarantee useful performance. That assumption deserves scrutiny. This guide compares the practical factors behind machine selection, including lifecycle cost, safety, integration, marking quality, and operator experience.
What Is a Dot Peen Marking Machine and How Does It Work?
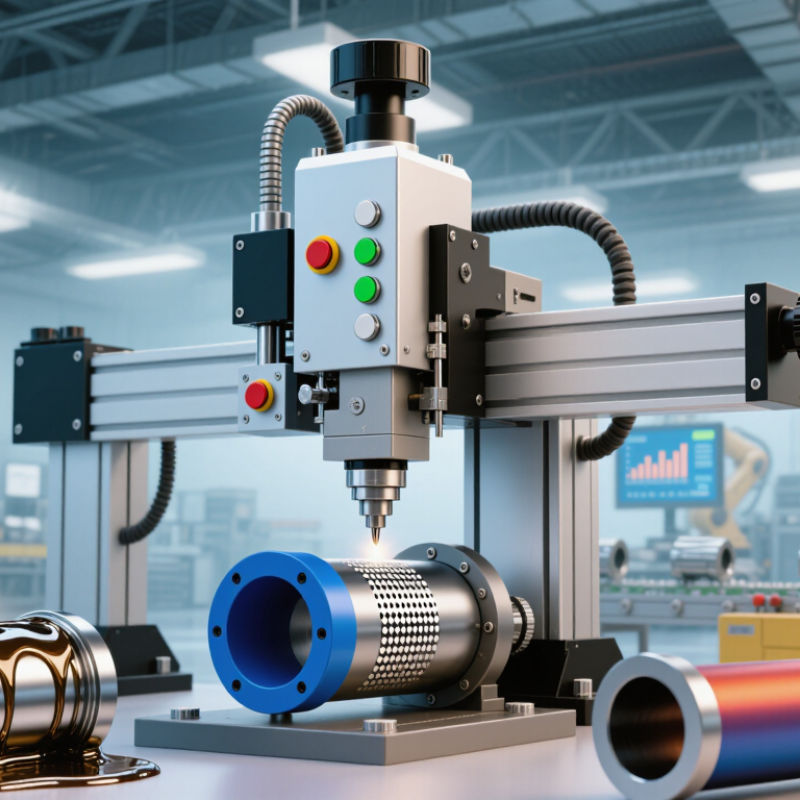
A dot peen marking machine creates permanent identification marks through controlled impacts. A carbide or diamond-tipped stylus strikes the surface repeatedly. Each impact forms a small, visible dot. Together, these dots create letters, numbers, logos, or two-dimensional codes.
The stylus moves along programmed paths. Pneumatic or electric force controls the impact depth. The machine can mark steel, aluminum, plastic, and other suitable materials. It does not usually remove much material, so part strength remains largely unchanged. On a steel bracket, for example, it may mark a serial number beside a production date. The result is often readable after painting or moderate surface wear.
When choosing a machine in 2026, examine your material, marking area, production speed, and traceability needs. Hard steel may require greater pin force and a rigid frame. Small components need accurate positioning. Large parts may need a portable marking head. Test real samples before purchasing. A mark that looks clear on polished metal may become weak on curved or uneven surfaces. That assumption can be wrong.
Ask whether the control system supports data import, code checking, and secure user access. These features can reduce typing errors in busy production areas. Also inspect noise levels, maintenance access, and fixture compatibility. I have seen teams focus on speed and overlook part stability. The machine was powerful, but the marks varied. A simple fixture solved part of the problem, though not all of it. Review the samples under normal lighting and after handling.
How to Choose a Dot Peen Marking Machine in 2026? - What Is a Dot Peen Marking Machine and How Does It Work?
| Selection Dimension | What It Means | Typical Technical Range or Fact | Recommended Choice Criteria |
|---|---|---|---|
| Operating Principle | A carbide or diamond-tipped stylus is driven against the workpiece to create a sequence of permanent individual dots. | The controller positions the marking head on the X-Y axes while impact force and dot spacing determine the character appearance. | Choose dot peen marking when durable, direct-part marking is required without ink, labels, or chemical etching. |
| Marking Method | Marks are formed by controlled mechanical impacts rather than removing material with a laser beam or printing onto the surface. | Suitable for alphanumeric text, serial numbers, dates, logos, Data Matrix codes, and traceability identifiers. | Select a machine with the required fonts, symbols, barcode formats, and serialization functions. |
| Compatible Materials | Dot peen machines work best on materials that can withstand localized impact without unacceptable deformation. | Common applications include steel, stainless steel, aluminum, brass, copper, cast iron, and selected engineering plastics. | Test the actual alloy, hardness, coating, and surface finish before final selection. |
| Marking Depth | Depth is the distance the dots penetrate below the original surface. | Many general-purpose systems produce approximately 0.1–0.5 mm depth, while actual results depend on material hardness, stylus type, impact force, and settings. | Use adjustable impact force for thin parts, hard materials, or applications requiring a specific depth. |
| Marking Speed | Speed depends on character height, message length, dot density, code type, material, and acceleration settings. | Short text can often be marked within seconds; complex codes and deeper marks require more time. | Compare complete cycle time rather than only the advertised point or impact frequency. |
| Marking Area | The marking window is the maximum area the stylus can reach without repositioning the workpiece or marking head. | Common marking windows range from compact areas of roughly 50 × 20 mm to larger areas exceeding 150 × 50 mm. | Choose a window larger than the longest intended message, including any required code and logo. |
| Character Height | Character height affects readability, available message length, and marking cycle time. | Many machines support character heights from approximately 1–10 mm or more, depending on the marking head and software. | Select a height that remains readable after painting, coating, cleaning, and normal service wear. |
| Code Quality | Data Matrix and other two-dimensional codes require consistent dot size, spacing, contrast, and positioning. | Code readability is affected by surface curvature, roughness, dot depth, cell size, and inspection distance. | Perform verification using the intended scanner and the applicable internal or industry quality requirements. |
| Surface Geometry | The contact between the marking head and the workpiece influences dot consistency. | Flat surfaces are simplest; curved surfaces may require a contour adapter, rotary axis, or specialized fixture. | Confirm the allowable curvature, marking angle, and access clearance before purchasing. |
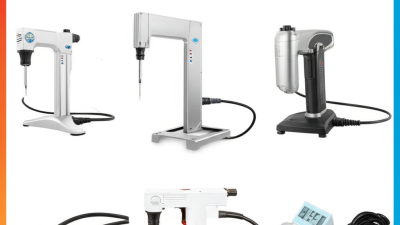
| Machine Configuration | The machine may be handheld, integrated into a production line, mounted on a column, or used as a benchtop unit. | Handheld systems offer flexibility; fixed systems generally provide more repeatable positioning and clamping. | Choose handheld operation for varied part sizes and fixed automation for high-volume, repeatable production. |
| Workpiece Fixturing | A stable fixture prevents vibration and movement while the stylus impacts the surface. | Poor clamping can cause irregular dot depth, blurred characters, misaligned codes, or inconsistent readability. | Budget for dedicated fixtures, locating pins, clamps, or a fixture table when repeatability is important. |
| Control and Connectivity | The controller stores marking layouts and may exchange production data with external systems. | Useful functions include USB or Ethernet connectivity, I/O signals, variable data fields, counters, and database integration. | Verify compatibility with PLCs, manufacturing execution systems, scanners, and existing traceability software. |
| Operating Environment | Dust, oil, coolant, vibration, temperature, and humidity can affect reliability and maintenance needs. | Industrial installations commonly require protective enclosures, sealed controls, and suitable ingress protection. | Match the machine’s environmental rating to the actual workplace and provide protection from chips and liquids. |
| Maintenance Requirements | The stylus and impact mechanism are wear components that require inspection and eventual replacement. | Routine tasks include cleaning the nosepiece, checking stylus wear, tightening fixtures, and backing up marking programs. | Choose a design with accessible wear parts, clear maintenance instructions, and readily available replacement components. |
| Noise and Safety | Repeated impacts generate mechanical noise and may produce small particles from the marked surface. | Risk controls may include guarding, eye protection, hearing protection, chip extraction, and safe workholding. | Conduct a workplace risk assessment and follow applicable local machinery and occupational-safety requirements. |
| Best-Fit Application | Dot peen marking is particularly suitable for permanent identification and traceability on metal components. | Typical uses include automotive parts, tools, machined components, pipes, structural parts, and industrial equipment. | Prioritize durability and low operating cost when the mark must remain readable throughout the product life cycle. |
Related Posts
-
What Is Dot Peen Marking and How Does It Work?
-

5 Key Insights to Maximize Your Investment in Dot Pin Marking Machines
-
How to Navigate the Global Marking Machine Market Trends for 2025 with Key Industry Insights
-
How to Choose the Best Dot Peen Machine for Your Needs?
-
Top 10 Handheld Dot Peen Marking Machines from Chinese Manufacturers at the 137th Canton Fair
-

2023 Ultimate Guide to Best Dot Peen Marking Solutions for Global Buyers